
시큐리티 시작 전 권한 문제때문에 yml에서 context-path를 지워줘야 한다. 당연히 마찬가지로 context-path를 적어줬던 모든 것들을 지워준다.
Spring Security
이전에 pom.xml에서 security 관련 dependency을 주석처리했었는데 풀어준다.
이후에 메인 페이지인 http://localhost:8000에 접속하면 다음과 같이 http://localhost:8000/login으로 이동된다. 시큐리티가 우리 홈페이지 어느 곳에 접근하던지 가로채서 이 화면으로 보내버리는 것이다. 잠긴 이유는 pom.xml의 시큐리티 dependency 때문이다.
접속하려면 console창에 적힌 비밀번호를 이용해 접근해야 한다.

로그인 후 접근하면 메인페이지로 잘 이동한다. 이때부터는 세션이 자동으로 생성된다. 로그인은 시프링 시큐리티가 가로채서 할 수 있기 때문이다.
Spring Security Taglib
https://www.baeldung.com/spring-security-taglibs
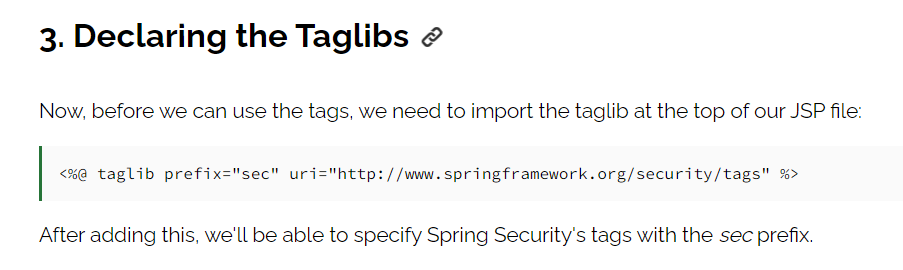
header.jsp 맨위에 위 코드를 추가해서 스프링 시큐리티 태그 lib를 적용한다.
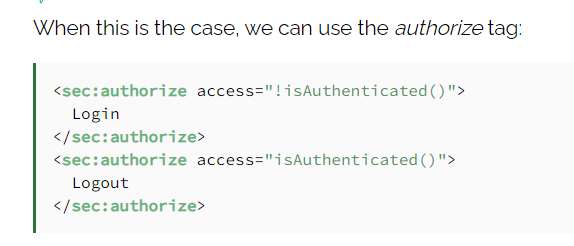
스프링 시큐리티 공식 문서와 taglib에 나와있듯이 isAuthenticated()로 인증 여부 즉, 로그인 여부를 확인하고 principal로 그 로그인 정보를 가져올 수 있다.
header.jsp
<%@ taglib prefix="sec" uri="http://www.springframework.org/security/tags" %>
<sec:authorize access="isAuthenticated()">
<script>
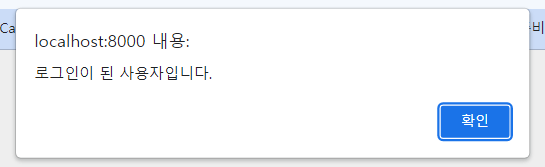
alert("로그인이 된 사용자입니다.");
</script>
</sec:authorize>
접속 후 로그인 시 아래 문구가 뜨고 메인 화면으로 이동한다.
principal
| principal | Allows direct access to the principal object that represents the current user. |
현재 object에 접근할 수 있도록 해준다.
<sec:authorize access="isAuthenticated()">
	<sec:authentication property="principal" var="principal"/>
</sec:authorize>

...

	<%-- <c:when test="${empty sessionScope.principal }"> --%>
	<c:when test="${empty principal }">
		<ul class="navbar-nav">
			<li class="nav-item"><a class="nav-link" href="/loginForm">로그인</a></li>
			<li class="nav-item"><a class="nav-link" href="/joinForm">회원가입</a></li>
		</ul>
	</c:when>

 ...
로그인이 확인되면 해당 페이지에서 사용할 수 있는 principal 변수로 다 저장된다. 그래서 그냥 principal만 적어줘도 잘 작동한다.
principal이 뭘 들고 있는 지 보기 위해 찍어보면 아래처럼 나온다. 이건 나중에 커스터마이징 할 수 있다.

Spring Security 로그인 페이지 커스터마이징
1. 주소 정리
인증이 안된 사용자들은 "/auth/**" 경로만 허용시켜서 회원가입, 로그인 화면만 접근할 수 있도록 한다. 또한 그냥 주소가 "/" 면 메인 페이지인 index.jsp 접속을 허용시켜준다. static 이하에 있는 "/js/**", "/css/**", "/image/**"도 허용시켜준다.
UserController.java
	@GetMapping("/auth/joinForm")
	public String joinForm() {

		...
	}

	@GetMapping("/auth/loginForm")
	public String loginForm() {

		...
	}
UserApiController.java
	@PostMapping("/auth/joinProc")
	public ResponseDto<Integer> save(@RequestBody User user) {

		...
}
로그인은 이제 전통적인 방식으로 하지 않고 스프링 시큐리티를 사용할 것이기 때문에 컨트롤러, 서비스, 레포지토리에서 관련 코드를 다 지워준다.
loginForm.jsp에서 <script src="/js/user.js"></script>를 사용하지 않고 폼으로 바로 로그인할 것이기 때문에 버튼를 폼 안에 넣어준다.
폼 로그인은 id값을 들고 와서 jquery에서 id 값을 찾아서 json으로 만들어서 전송하는 것이 아니라 name값을 이용해 찾아오므로 지정해줘야 한다. action과 mehod 속성도 지정해준다.
...
<div class="container">

	<!-- 로그인 폼 -->
	<form action="#" method="post">
		<div class="form-group">
			<label for="username">Username</label>
			<input type="text" name="username" class="form-control" placeholder="Enter username" id="username">
		</div>

		<div class="form-group">
			<label for="password">Password:</label>
			<input type="password" name="password" class="form-control" placeholder="Enter password" id="password">
		</div>

		<div class="form-group form-check">
			<label class="form-check-label">
			<input name="remember"class="form-check-input" type="checkbox"> Remember me
			</label>
		</div>
		<button id="btn-login" class="btn btn-primary">로그인</button>
	</form>

</div>

...
header.js에서 로그인과 회원가입 링크를 인증이 없어도 들어갈 수 있도록 /auth를 붙여준다.
user.js에서 로그인 관련 코드를 지우고 회원가입 url을 "/auth/joinProc"으로 바꿔준다.
let index = {
    ...

    save: function(){
        ...

		$.ajax({
			// 회원가입 수행 요청
			type: "POST",
			url: "/auth/joinProc",
			data: JSON.stringify(data),

			...
    },
}

index.init();
2. 스프링 시큐리티 로그인
config 패키지 생성 후 SecurityConfig.java 코딩
// 아래 3개는 세트
@Configuration // 빈 등록: 스프링 컨테이너에서 객체를 관리할 수 있도록
@EnableWebSecurity  // 시큐리티 필터 등록 - request가 컨트롤에서 동작하기 전 시큐리티가 다 가로채서 필터 돌림
@EnableGlobalMethodSecurity(prePostEnabled = true) // 특정 주소로 접근을 하면 권한 및 인증을 미리 체크하겠다는 뜻.
public class SecurityConfig extends WebSecurityConfigurerAdapter{


	@Override
	protected void configure(HttpSecurity http) throws Exception {
		http
        	.csrf().disable() // csrf 토큰 비활성화 (테스트시 걸어두는 게 좋음)
			.authorizeRequests()	// request가 들어오면
			.antMatchers("/", "/auth/**", "/js/**", "/css/**", "/image/**")	 // 이 주소로의 요청은				.permitAll()	// 어떠한 보안 요구 없이 요청을 허용
			.anyRequest() // 이게 아닌 다른 요청은
			.authenticated(); // 인증이 필요하다.
	}
}
yml에 ddl-auto가 update인 지 확인 후 메인 페이지에 접속해보면 액세스가 거부되는 것을 확인할 수 있다.

/auth/loginForm과 /auth/joinForm은 접속된다!
접근 제한이 떴을 때 권한을 요청하는 페이지로 보내주기 위해 다음 코드를 추가해준다.
			.and()
				.formLogin()
				.loginPage("/auth/loginForm");
이제 "/"로 접속해도 로그인 요청 페이지로 이동된다.
출처 : https://www.youtube.com/c/%EB%A9%94%ED%83%80%EC%BD%94%EB%94%A9
'Spring > Blog 만들기 with SpringBoot' 카테고리의 다른 글
| 게시판 (0) | 2022.07.25 |
|---|---|
| 비밀번호 해쉬 & 시큐리티 로그인 (0) | 2022.07.24 |
| 전통적인 방식의 로그인 (0) | 2022.07.09 |
| 스프링 JPA의 OSIV 전략 (0) | 2022.07.09 |
| DB 격리수준, 스프링의 트랜잭션 (0) | 2022.07.09 |